
 Supplies Needed:
Full Body and Close up tube of choice
I am using artwork by Keith Garvey. You need a license to use his work and you may purchase his tubes at MPT.
Scrapkit Trick or Treat by Bits N Bobs Scraps and you can purchase HERE
Template by ME and you can get it HERE
Filters Used:
Eye Candy Xenofex 2 Lightening
Mura Meister Clouds
Eye Candy Impact Gradient Glow (optional)
Open my Template. Duplicate and close the original.
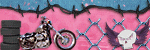
Activate Raster1 Layer (yea I didn't rename them since there is only 2 layers) use your magic wand to select it. Open paper of choice (I used BNB-tot-paper-8) and copy and paste as a new layer. Resize the paper by 60% and invert selection and hit delete. Apply a white and black gradient glow with Eyecandy Gradient Glow (optional)
Activate Raster2 Layer and duplicate it 2 time and name the layer Cloud 1, Cloud 2, Cloud 3. Now on cloud 1 layer use your magic wand to select it and apply Mura Miester Clouds and change amount to 50. Keep it selected.
Cloud 2 = Amount 55
Cloud 3 = Amount 60
Now copy and paste your Close up tube and got to selection/invert and hit delete. Deselect
Now add a new layer and apply the Xenofex Lightening filter, Default setting. Now resize 80% and move to the corner of the rectangle.
Now open BNB-tot-25 and copy and paste as new layer and move above the Cloud layers as a frame.
Now open BNB-tot-67 and copy and paste as new layer. Re-size by 40% and position on the lower right corner.
Now open BNB-tot-70 and copy and paste as new layer. Re-size by 40% and position on the left side of the house.
Now open BNB-tot-1 and copy and paste as new layer and position it in the left corner of the rectangle. (look at my tag for references)
Now open BNB-tot-19 and copy and paste as new layer. Re-size 70% and drag so that it it right above the rectangle.
Add your name and copyright info.
Now time for animation. (NOTE- I am not a very good animator. So I have been animating this way since I first started PSPing and never learned a new way. So feel free to animate the way you were taught if different then my own way)
Open Animation Shop. With Cloud 1 layer unhidden copy merged and paste as new animation in Animation shop.
Do the same for Cloud 2 except paste after current frame, then the same to cloud 3.
Now that all 3 frame are in Animation shop go to Edit Select all. Then go to Animation/Frame properties and change it to 30. Then save and you are done. If you are having problems with your quality of your animation check HERE for help.


No comments:
Post a Comment