Wednesday, November 10, 2010

Snow Bunny Tut now up

Go check it out HERE

Wednesday, November 3, 2010

New tutorial!

Find it HERE

Monday, November 1, 2010

New site for my tutorials!


My friend Aimee aka Rainbow and I have finally started our own website to host our tutorials. All my previous tuts are there and I have 2 new ones over there as well. So head on over there and check out our site. Here is the link https://sites.google.com/site/punkypunkandthegirlygirltuts/home/

My 2 new tuts are Crazy Cool and Multiply Me


Friday, October 29, 2010

Fallen Angel

Click on the preview for the full image view
Artwork by Zindy S. D. Nielsen You need a license to use the tube I used and you can get one from her store HERE
Template by Me, Download HERE
Texture of choice
Font used: Angel Tears

Filters used:
Xero Porcelin
Gradient Glow

This tutorial is for those who have knowledge of PSP. Its a short but sweet tut. I hope you like it.


Open my template and duplicate. Close original. Delete Credit layer and change canvas size to 650x500.
Copy and paste your tube. Duplicate it 3 time. Close out 3 of the tubes.
Activate the Fallen layer and go to Selections/Select All/ Float then Defloat. Drag your tube over to the selection and position it where you like. Then go to selections/Invert and hit delete. Deselect and apply Xero Porcelin with default settings but change the blue channel to 0.
Activate the Fallen layer again and apply Gradiet Glow with a small white and black glow. Whatever settings you like. Make it your own.
Unhide and activate another tube layer. Mirror. Activate Angel layer and go to selections/select all/float and defloat. Activate your tube layer and drag it over to your selection and go to selections/invert and hit delete. Go to effects and apply the Xero Porcelin with the same settings as before.
Activate your rectangle layer and use magic wand to select it. Add a new raster layer. Open your texture and copy and paste INTO selection. Change the layer properties to Luminance (L) Do NOT deselect.
Unhide another one of your tube layers. Position where you like, I had to mirror mine. Invert selection and hit delete. Change the layer properties to soft light.
Unhide your last tube. Resize 60% or to desired size. Apply dropshadow of choice.
Now you can take it from here to make it your own. I loved mine after this point but you might choose to add some scrapbook elements or a mask.
Crop it to desired size.
Dont forget to add copyright info.
I would LOVE to see your results. Email them to me at ChaneyJo@gmail.com

Tuesday, October 26, 2010

Elegant


Artwork by Ismael Rac. You MUST purchase a license to use his work and you can do so at his store HERE
Scrapkit, Opposites Attract, by Bits N Bobs can be purchased HERE
Template #30 by Me HERE
Mask of choice

Filters used:
Unplugged X-Pattern Offset
Gradient Glow if desired. I used it in my text


Open my template and duplicate it. Close the original. Delete Credits Layer
Add a new layer and drag it below the Slats layers. Flood Fill with black or color of choice. Then apply your mask.
Activate Slats1 layer and go to effects Unplugged X-Pattern Offset and change the offset to 30. Do the same for Slats2
Activate Gray Oval and add noise at 75% or whatever looks good to you.
Activate Squares and go to Selections/Select all/ Float, then Defloat. Open Paper-8 and copy and paste it as new layer. Resize by 80%, All Layer unchecked. Then go to Selections/Invert and hit the delete key.Deselect
Activate Black oval and go to Selections/Select all/Float, then Defloat. Open Paper-6 and copy and paste as new layer. Resize 70%, All Layers still unchecked. Selections/Invert, Hit delete. Do NOT deselect. Then copy and paste your closeup tube as new layer. Hit the delete key again. Changed layer properties to Luminance (L)
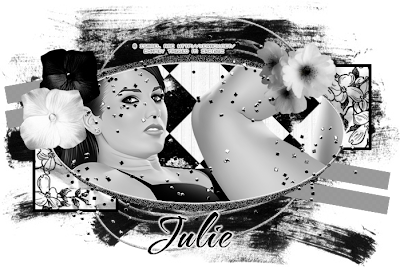
Now time to add some elements. This is time to make it your own creation but I will tell you what I did for examples
First I took scribble-1 resized 70% and positioned it in the back of the tag.
Flower-2 and resized 40% and positioned it on the right scquare. Now take Sprinkles-1 and copy and paste as new layer.
Flower-3 and resized 50% and positioned to the left side.
Flower-4 and resized 55% and position it next to Flower-3

Now add your copyright info and name and you are all done. Thank you for trying my tut and I would love to see your results.


Sunday, September 26, 2010

Rock Baby


Artwork by Ismael Rac get at AMI
Scrapkit Rock Baby by Pink Pleasures Scraps
Mask #407 by Vix here

Open RB_pp11. Duplicate and close original. Apply Vix mask #407. Merge Group
Take selection tool, rectangle, and outline the inside of one of the rectangles.

Copy and paste your tube. Move into the selection then invert selection and delete. Select none.
Duplicate tube. Name layers Tube1 and Tube2.

Make Tube1 layer active and duplicate it. Apply Gaussian blue - 4 to the original layer.
Go to layer properties and change blend mode to soft light.
Activate Copy of Tube1 layer and change blend mode to Luminace Legacy.

Go to Tube2 layer and repeat the same steps as above. Merge all Visible.

Open RB_ele35 and copy and paste it as a new layer. Bring the layer under the merged layer.
Move to upper left corner. Duplicate, Mirror and Flip.

Copy and paste your tube. Position it they way you like. Apply dropshadow to your liking.

Now you can choose elements you like and postion them how you like.
Dont forget to add credits where needed.

Thank you and hope you enjoyed my tut.

Sexy Eyes


You will need:
A tube and a close up tube.
Artwork by Ismael Rac. You can get a license to use his art at AMI
Scrap kit Dominated by Tantrum Scraps. Can get it here.
Mask by Rachel at Scraps of Enchantment.
Preset Shape from Scrap Stuff here.
Filters Needed.
Superblade Pro Preset Crystal Crunch you can get here
Eyecandy Gradient Glow

Fonts I used are Impact and TheNautiGirl

Open a New Tansparent 600x600 (we can resize later)

Using your Preset Shapes tool draw out your shape to your desired size. I used SK Psycadelic 06. Convert to Raster Layer and rename shape

Grab your magic wand tool. Select the outside line of your shape. Add New Raster layer. Flood Fill with a color from your tube.

Make your shape layer active again and using your magic wand select the middle line of the shape. Add New Raster layer.Flood Fill with a diffrent color from your tube.

Make your shape layer active again and using your magic wand select the middle part of our shape. Add New Raster layer.Flood Fill with the same color from the first line.

Make your First line layer active. Go to Effect, Plugins Superblade Pro. Use the Crystal Crunch preset. Do the same for the middle part of the the shape.

Make your Middle Line layer active. Go to adjust-add/remove noise. Add Noise at 55% with uniform and monochrome checked.

Make the middle part of your shape active again. Selections, Float, then Defloat. Cope and paste your tube as New layer. Move where desired. Selections, Invert and hit Delete.

Invert selection again. Duplicate your tube. One the original tube layer Adjust-Blur-Gaussian Blur-3. Change Layer Blend mode to Soft Light.

On Duplicated layer change blend mode to Luminance Legacy. Merge All Visible. Add Dropshadow H and V-0, O-60, B-6

New Rasterlayer. Flood Fill Black. Load SOE_Mask17_byRachel09. Merge Group and move Below other merged layer.

Open Tantrum Scraps Dominated_glitterframe3. Copy and paste and position where you like.
Copy and paste your tube. Resize if needed and postion where you like.
Now you can add any elements or wordart you like.
Dont forget to add your credits!

Thank you for trying my tut. If you have any questions or would like to send me your results email me at ChaneyJo@gmail.com