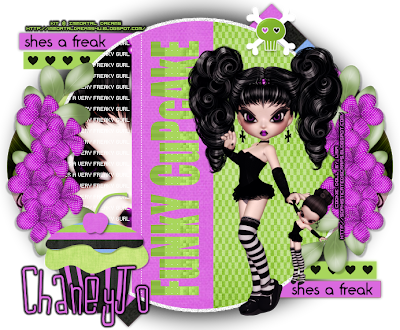
This tutorial is written for those with working knowledge of PSP.
Cookie Poser by Lisa (found in the Funky Cupcake kit)
Scrapkit, Funky Cupcake, by Immortal Dreams
Template #55 by Rose at Tag Templates and More
Filters-Xera Radiance and Filtary
Vanderlee Unplugged-Interlace
Pentacom - Color Dot
Eye Candy Gradient Glow for text- Optional
Open Template 55 and duplicate. Close the original.
Activate BigCircle layer and use your selection tool/rectangle to select the left half of the circle. Selection/Float, Defloat. Open up paper_8 and copy and paste INTO selection. Now open Lisa's Cookie and copy and paste as new layer. Position where desired. Resize if desires (I didn't resize) Selecion/Invert and hit delete. Go to Effects/Plugins/Xero Radiance and use default settings or settings you like.
Not activate BigCircle again and use your selections tool/rectangle to select the right side of the circle. Selections/Float, Defloat. Open paper_9 and copy and paste INTO selection. Deselect.
Activate pinkstrip and select it with magic wand. Open paper 3 and copy and paste as new layer. Selections/Invert and hit delete. Deselect.Delete orginal layer.
Activate circle2 and select it with magic wand. Add paper or color of choice. I chose to do a gradient of the purple and green color from the kit. With the circle still selection paste the poser again and drag so the dolls head is in the selection. Selections/Invert and hit delete. Deselect.
Change the layer properties to Luninace (L). Merge the circle layer and doll layer together. Duplicate and mirror. Delete the orginal circle layers or blur them to make them look like shadows
Activate Raster2 and go to Adjust/Brightness Contrast and make brightness -200. Should make the oval black. Go to Adjust/Blur Gausian Blur 20.
Activate SmRec3 and use your magic wand to select it. Go to Selections/Modify and smooth by 5 pixels. Flood fill with #da69df. Do the same to SmRec4.
Activate SmRec2 and do the same as before but floodfill with #a8d65c. Do the same for SmRec1.
Delete the FreakyGirl layer and use Imact or another thick font to write FuNkY CuPcAkE in #a8d65c.
Now Convert it to Raste layer and Use your magic wand to select the middle. Go to Effects/Plugins/ Penta.com and use Color dot distance 10. Deselect.
Now use selection tool to select the left part of the words and use Vanderlee/Unplugged/Interlace and default settings. Deselect.
Now use selection tool select right side and use Xero/Friltary default setting except Variation at a 10
Now time to add element.
Of course add the cookie. I resized her 30%.
Now add any elements you want to finish it up. look at my tag for examples.
Add copyright info.
Thank you for trying my tut.


No comments:
Post a Comment