

Artwork by Ismael Rac. You need a license to use his work and you can purchase his work from AMI
Template 114 by Yvette from Essence of Creativity
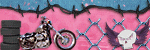
Scrapkit, Rock Princess, by Just a Girl Designs
Filters use: Xero-Soft Mood
Open Yvettes templater 114 and Shift+D to duplicate it and close the orginal. Delete the credits layer
Activate blue circles layer and use magic wand to select both of them. Open RockPrincess_bkg7 and copy and paste as a new layer. Selections/Invert and hit delete. DO NOT Deselect. Now open your tube and copy and paste as new payer. position where desired on the bottom circle and hit delete.
Paste tube again and postion it on the top circle and delete again. Deselect and merge the tube layers. Go to layer properties and change blend mode to multiply and opacity to 50, merge the tube layer down to the circles layer. Apply dropshadow of H&V - 0 Opacity-80 and Blur-6.
Delete the blue circles layer.
Activate largewhitecircle layer and use magic wand to select it. Add new raster layer and flood fill with color of choice. I used a darker pink color from my tube. Go to adjust, Add noise at Random, 50%. Deselect and delete original largewhitecircle layer.
Activate black rectangle and use magic wand to select it. Add a new raster layer. Now choose a light and dark layer from your tube. I used a light purple and dark purple to match the scrapkit. Select the foreground/background gradient, repeats 2, angle 0, and floodfill the selection. DO NOT Deselect. Paste you tube again and postion it to the left part of the rectangle. Selection, invert and then hit delete.Deselct. Duplicate and mirror. Merge tube layers Go to effects, xero and choose soft mood at default settings. Then go to layer properties and change blend mode to luminance legacy.
Apply drop shadow like before to the rectangle circle and then delete the orginal black rectangle layer.
Activate large pink layer and use magic wand select it. Open Rock Princess bkg6 and copy and paste as new layer. Resize by 50% then invert selection and delete. Apply dropshadow as before and then delete original pink circle layer.
Now paste your full body tube and paste it as a new layer and drag that layer to the top. Now merge the text layer with the thin black rectangles layer. Now use your selection to select part of the bottom rectangle behind your tubes leg area, selections/float and drag it above the tube layer
.
Now we can add elements. You can use my tag as an example or you can add different ones to your liking.
Activate the big circle paper layer and open RockPrincess_stardoodle and resize by 50%. Move to right side of your full body tube (see tag for example) and then duplicate and mirror.
Now you can add your copyright info and name. I used gradient glow on my name but it is not required.
Thank you for trying my tut.


No comments:
Post a Comment