

Need a tube and a close up tube.
Artwork by Ismael Rac. Must have a license to use his work and you can purchase that at AMI
Template 114 AND scrapkit Bad Candy by Toxic Desirez
Filters Used:
Penta.com Color dot
Xero Radiance
Open template, Delete credits and change canvas size 700x700
Activate Purple Circle layer and use magic wand to select it. Open Paper 2 (or paper of your choice) and copy and paste as new layer. Selections/Invert and hit delete key. Deselect.
Activate Green Circle layer and use magic wand to select it. Open Paper 13 (or paper of your choice) and copy and paste as new layer. Resize by 60%, position it so its all inside the selection and invert the select and delete. Deselect.
Activate Rectangle layer and use magic wand to select it. Open Paper 24 (or paper of your choice) and copy and paste as new layer. Invert selection and hit delete. Deselect.
Use #ff29b5 for your foreground and #40edff background gradient. Gradient settings- Angle 42 Repeat-0. Activate small white circle, select with magic wand and flood fill with your gradient.
Now change your foreground color to black. Activate LargeWhitecircle, select with magic want and flood fill with gradient. Deselect. Now use your selection tool, rectangle to select a section in the middle of the circle. Go to Effects/Filters and use Penta.com Colordot filter value-255 distance-10
Now open Bad Candy-Extras-Barbedwire and copy and paste it as a new layer. Resize by 70% and drag it below your pink paper circle. Delete the extra part that is hanging over.
Now open Splat1 and copy and paste as new layer. Resize 60% and move to the upper left corner. Duplicate layer and mirror then flip it. Merge that layer down and then drag the splat layer to the bottom so its behind everything else.
Open your close up tube. Copy and paste as new layer and mirror if desired. Activate and select your sml white circle and then activate your close up again and then invert selection and hit delete. Deselect.
Go to effects and apply your xero radiance filter with default settings. Then go to Layer properties and change blend mode to Luminance (L).
Now copy and paste your tube as new layer and position it where desired. Then delete the extra from around the outside of the circle. To do this I activate that circle layer. Selection/Float, then defloat. Then activate the tube layer, selection/invert and hit delete. But if you know of a diffrent way that works for you by all means use it ;)
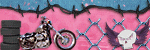
Now the fun part, adding all the elements. This is whre you can add your own twist but I will go ahead and tell you what I did.
First I added bow1 and resized it 70% and put it at the corner of the rectangle.
Then I added bunny and resized it 70% and put it in the right lower corner.
Then I added one of the butterflies and resized it 50% and put it in the upper right corner.
Then I added one of the labels in the Extras folder. You can add dropshadow of your desire.
Now add you name and copyright info and you are finished! I would love to see what you creat so email me those creation at ChaneyJo@gmail.com
Artwork by Ismael Rac. Must have a license to use his work and you can purchase that at AMI
Template 114 AND scrapkit Bad Candy by Toxic Desirez
Filters Used:
Penta.com Color dot
Xero Radiance
Open template, Delete credits and change canvas size 700x700
Activate Purple Circle layer and use magic wand to select it. Open Paper 2 (or paper of your choice) and copy and paste as new layer. Selections/Invert and hit delete key. Deselect.
Activate Green Circle layer and use magic wand to select it. Open Paper 13 (or paper of your choice) and copy and paste as new layer. Resize by 60%, position it so its all inside the selection and invert the select and delete. Deselect.
Activate Rectangle layer and use magic wand to select it. Open Paper 24 (or paper of your choice) and copy and paste as new layer. Invert selection and hit delete. Deselect.
Use #ff29b5 for your foreground and #40edff background gradient. Gradient settings- Angle 42 Repeat-0. Activate small white circle, select with magic wand and flood fill with your gradient.
Now change your foreground color to black. Activate LargeWhitecircle, select with magic want and flood fill with gradient. Deselect. Now use your selection tool, rectangle to select a section in the middle of the circle. Go to Effects/Filters and use Penta.com Colordot filter value-255 distance-10
Now open Bad Candy-Extras-Barbedwire and copy and paste it as a new layer. Resize by 70% and drag it below your pink paper circle. Delete the extra part that is hanging over.
Now open Splat1 and copy and paste as new layer. Resize 60% and move to the upper left corner. Duplicate layer and mirror then flip it. Merge that layer down and then drag the splat layer to the bottom so its behind everything else.
Open your close up tube. Copy and paste as new layer and mirror if desired. Activate and select your sml white circle and then activate your close up again and then invert selection and hit delete. Deselect.
Go to effects and apply your xero radiance filter with default settings. Then go to Layer properties and change blend mode to Luminance (L).
Now copy and paste your tube as new layer and position it where desired. Then delete the extra from around the outside of the circle. To do this I activate that circle layer. Selection/Float, then defloat. Then activate the tube layer, selection/invert and hit delete. But if you know of a diffrent way that works for you by all means use it ;)
Now the fun part, adding all the elements. This is whre you can add your own twist but I will go ahead and tell you what I did.
First I added bow1 and resized it 70% and put it at the corner of the rectangle.
Then I added bunny and resized it 70% and put it in the right lower corner.
Then I added one of the butterflies and resized it 50% and put it in the upper right corner.
Then I added one of the labels in the Extras folder. You can add dropshadow of your desire.
Now add you name and copyright info and you are finished! I would love to see what you creat so email me those creation at ChaneyJo@gmail.com


No comments:
Post a Comment