Showing posts with label Ismael Rac Tut. Show all posts

Wednesday, November 10, 2010

Snow Bunny Tut now up

Go check it out HERE

Tuesday, October 26, 2010

Elegant


Artwork by Ismael Rac. You MUST purchase a license to use his work and you can do so at his store HERE
Scrapkit, Opposites Attract, by Bits N Bobs can be purchased HERE
Template #30 by Me HERE
Mask of choice

Filters used:
Unplugged X-Pattern Offset
Gradient Glow if desired. I used it in my text


Open my template and duplicate it. Close the original. Delete Credits Layer
Add a new layer and drag it below the Slats layers. Flood Fill with black or color of choice. Then apply your mask.
Activate Slats1 layer and go to effects Unplugged X-Pattern Offset and change the offset to 30. Do the same for Slats2
Activate Gray Oval and add noise at 75% or whatever looks good to you.
Activate Squares and go to Selections/Select all/ Float, then Defloat. Open Paper-8 and copy and paste it as new layer. Resize by 80%, All Layer unchecked. Then go to Selections/Invert and hit the delete key.Deselect
Activate Black oval and go to Selections/Select all/Float, then Defloat. Open Paper-6 and copy and paste as new layer. Resize 70%, All Layers still unchecked. Selections/Invert, Hit delete. Do NOT deselect. Then copy and paste your closeup tube as new layer. Hit the delete key again. Changed layer properties to Luminance (L)
Now time to add some elements. This is time to make it your own creation but I will tell you what I did for examples
First I took scribble-1 resized 70% and positioned it in the back of the tag.
Flower-2 and resized 40% and positioned it on the right scquare. Now take Sprinkles-1 and copy and paste as new layer.
Flower-3 and resized 50% and positioned to the left side.
Flower-4 and resized 55% and position it next to Flower-3

Now add your copyright info and name and you are all done. Thank you for trying my tut and I would love to see your results.


Sunday, September 26, 2010

Rock Baby


Artwork by Ismael Rac get at AMI
Scrapkit Rock Baby by Pink Pleasures Scraps
Mask #407 by Vix here

Open RB_pp11. Duplicate and close original. Apply Vix mask #407. Merge Group
Take selection tool, rectangle, and outline the inside of one of the rectangles.

Copy and paste your tube. Move into the selection then invert selection and delete. Select none.
Duplicate tube. Name layers Tube1 and Tube2.

Make Tube1 layer active and duplicate it. Apply Gaussian blue - 4 to the original layer.
Go to layer properties and change blend mode to soft light.
Activate Copy of Tube1 layer and change blend mode to Luminace Legacy.

Go to Tube2 layer and repeat the same steps as above. Merge all Visible.

Open RB_ele35 and copy and paste it as a new layer. Bring the layer under the merged layer.
Move to upper left corner. Duplicate, Mirror and Flip.

Copy and paste your tube. Position it they way you like. Apply dropshadow to your liking.

Now you can choose elements you like and postion them how you like.
Dont forget to add credits where needed.

Thank you and hope you enjoyed my tut.

Sexy Eyes


You will need:
A tube and a close up tube.
Artwork by Ismael Rac. You can get a license to use his art at AMI
Scrap kit Dominated by Tantrum Scraps. Can get it here.
Mask by Rachel at Scraps of Enchantment.
Preset Shape from Scrap Stuff here.
Filters Needed.
Superblade Pro Preset Crystal Crunch you can get here
Eyecandy Gradient Glow

Fonts I used are Impact and TheNautiGirl

Open a New Tansparent 600x600 (we can resize later)

Using your Preset Shapes tool draw out your shape to your desired size. I used SK Psycadelic 06. Convert to Raster Layer and rename shape

Grab your magic wand tool. Select the outside line of your shape. Add New Raster layer. Flood Fill with a color from your tube.

Make your shape layer active again and using your magic wand select the middle line of the shape. Add New Raster layer.Flood Fill with a diffrent color from your tube.

Make your shape layer active again and using your magic wand select the middle part of our shape. Add New Raster layer.Flood Fill with the same color from the first line.

Make your First line layer active. Go to Effect, Plugins Superblade Pro. Use the Crystal Crunch preset. Do the same for the middle part of the the shape.

Make your Middle Line layer active. Go to adjust-add/remove noise. Add Noise at 55% with uniform and monochrome checked.

Make the middle part of your shape active again. Selections, Float, then Defloat. Cope and paste your tube as New layer. Move where desired. Selections, Invert and hit Delete.

Invert selection again. Duplicate your tube. One the original tube layer Adjust-Blur-Gaussian Blur-3. Change Layer Blend mode to Soft Light.

On Duplicated layer change blend mode to Luminance Legacy. Merge All Visible. Add Dropshadow H and V-0, O-60, B-6

New Rasterlayer. Flood Fill Black. Load SOE_Mask17_byRachel09. Merge Group and move Below other merged layer.

Open Tantrum Scraps Dominated_glitterframe3. Copy and paste and position where you like.
Copy and paste your tube. Resize if needed and postion where you like.
Now you can add any elements or wordart you like.
Dont forget to add your credits!

Thank you for trying my tut. If you have any questions or would like to send me your results email me at ChaneyJo@gmail.com

Saturday, August 21, 2010

Mayhem


Artwork by Ismael Rac. Need a license to use his art. You can now purchase at his store HERE
Scrapkit Mayhem by Bits N Bobs can be purchased HERE

No outside filters used

Open element-94 and duplicate it and close original. Change canvas size to 700x700 (we can resize later) move the curtian to the top of the canvas.
Add a new layer and flood fill with black. Apply mask or choice. Merge group and drag below the curtain.
Add a new layer and take your selection tool/rectangle and draw out a rectangle from one part of the curtian to the other. flood fill with white. Deselect. Duplicate and resize by 80%. Duplicate again and resize by 80%
Now add drop shadow to your "steps" and then merge them together.
Add a new layer. take your selection tool/rectangle and draw out another rectangle from the steps to half way up the curtian. (to fill in the back of the curtian with a paper) Open paper of choice and copy and paste INTO selection.
Now open your close up tube and copy and paste as a new layer. Selections/invert and hit delete. Deselect. Change layer properties to Luminance Legacy.
Now open element-86 copy and paste and drag below Steps layer. Position it on the left side of the steps. Duplicate and mirror.
open element-80 and then copy and paste as new layer. Position it on the left side of the top of the curtian. Duplicate and mirror.
Now open you full body tube. Copy and paste as new layer. Postion to the left side of the canvas. Then Duplicate and mirror. Change the layer properties on the mirrored layer to overlay.
Open element-66 and 75 and copy and paste them as new layers and position them right under the pole.
We are done. Wasn't that easy ;)
Don't forget your copyright!!!

Monday, August 9, 2010

Happy Halloween


Full body tube and 3 closeup tubes

Artwork by Ismael Rac which can be purchased at his store HERE
Template by Vicky which you can get from Creative Misfits Blog HERE
Scrapkit, Trick or Treak, by Bit N Bobs you can purchase it HERE

My tutorials are for those with working knowledge of PSP. My tuts are meant to be a guide. Make it your own. Use difrent colors or tubes or anything to make it for yourself.


Open template and duplicate and close original

Delete info and delete Shape 2 layer.

Open BNB-tot-72 and copy and paste as new layer. Resize to desired size and position where desired. (see my tag for example)
Activate Shape4 and use magic want to select it. Open BNB-tot-Paper1. Copy and paste it INTO SELECTION.
Choose 2 colors for your background/foreground gradient. I chose a purple and orange.
Activate Shape 1 and use magic wand to select it. Flood Fill with Gradient and copy an paste one of your closeup tubes. Position into the selection and go to Selections/Invert and hit delete. Deslect and change properties on tube layer to Luminance Legacy.
Do the same for the other 2 shape 1 copy.
Now add some elements. I added BNB-tot-15, BNB-tot-44, BNB-tot-30, and BNB-tot-9.

Now for BNB-tot-9 free rotate 90 degree. Position on th right sie of the tag. Drag below Shape1. Now duplicate and position on the left side of the tag.

Now add your copyright info and your name. Font I used is 2Peas Mister Giggles.

Thank you for trying my tutorial. I hope that you liked it and i would love to see your creations.

Monday, July 19, 2010

Classy Lady


Artwork by Ismael Rac which you can now purchase his tubes from his independant store HERE
Scrapkit, Classy Girl by Rieneke which can be purchased HERE

Open classyg_frame1 and duplicate it and close the orginal. Resize it by 70 percent. Open your half body tube and copy and paste as a new layer. Activate your frame again and use magic want to select inside the frame. Expand the selection by 3 and Invert. Use your eraser tool to erase
the part of the tube that hangs over the frame. Invert selection again.

Now open classyg_ppr4 or a paper of your choice. Resize it if desired and invert selection and hit delete. Deselect. Drag below frame layer

Now open close up tube and copy and paste and mirror. Select the inside of the frame again and this time expand by 6 and invert selection with the tube layer active hit delete. Deselect.

Now with your tube layer active go to selections/select all/float, defloat. Open another paper of choice and copy and paste as new layer. Resize by 50% and invert selection hit delete. Deselect

Now change the layer properties on that layer to Overlay. And change the layer prop on the close up tube layer to Luminace (L)

Now open classyg_swirl1 and copy and paste as new layer and drag layer to the bottom.

Now activate your tube layer and open classyg_diva and copy and paste as new layer. Resize as needed and postion where desired.

Now open classyg_bow1 and copy and paste as new layer and resize to desired size. I think I resized by 50%. Postion on the right side of the frame.

Now open classyg_ribbon5 and copy as paste as new layer and resize by 40% and move to the bottom part of the frame

Now open classyg_parfume and copy and paste it as new layer. Resize 30% and position it to the bottom left side of the frame

Now open classyg_umbrella and copy and paste as new layer. Resize 30% and position it infount of the parfume bottle

Now open classyg_tiara and copy and paste an new layer. Resize 30% and postion it in frount of the umbrella.

Now find a scripty font and write Classy Lady in the top left corner. Covert to raster, adjust/add noise to your liking. Add black gradient glow.

Now add your copyright info. And your name in the same fashion of your Classy Lady.

Thursday, July 8, 2010

Hot Music


You will need:
Tube, Close up and full/half body, Artwork by Ismael Rac you can now purchase his tubes at his independant store HERE
Scrapkit, Hot Music, by Toxic Desirez

Filters used (but optional)
Xero Radiance
Eye Candy gradient glow

New file 700x700 (resize/crop later)
Open your tubes, full/half body and close up. Minimize for later.
Open Kristin-Hot Music-Frame 2 and copy and paste as new layer. Resize by 70%. Now use magic wand to select in each part of the frame. Expand selection by 2 and add new raster layer. Open Paper of choice and copy and paste INTO selection. Drag that layer below the frame layer. DO NOT deselect
Copy and paste your half body tube and drag it above the frame layer. Resize if needed.(if her head is out of the frame thats ok we will move he down later) Position it so that one leg is in the part of the frame and the other leg is in the other part. If your tube isn't shaped for that position just put both "legs" in one part of the frame. Selections/Invert and use your eraser tool to erase the the part of the tube that hang over. Deselect.
Now activate the frame layer again and use your magic wand to select just one half of the frame. Expand by 2. Open your close up and copy and paste as new layer. Selections/Invert and hit delete. Deselect. Go to Effect/Xero Radiance with default settings. Change layer properties to Luminance (L)
Now duplicate and mirror. Position it in the frame if needed. Hide your half/full body tube. Merge visible. Now unhide your tube layer and activate it and choose merge down. Now move them to the bottom part of the image.
Now open CD and copy and paste as a new layer. Position on the upper left side and drag it to the bottom. Now go to Selections/Select all/Float, then Defloat. Copy and paste your close up again and selections/invert and hit delete. Change the layer properties to soft light.
Now open the following elements:
Piano Keys
sparkles
Tag 1
Flower 1 & 2
Glitter 2
doodle 3

Copy and paste Glitter 2 as new layer. Resize by 90% and move to the bottom.
Copy and paste piano keys, resize by 70% and move to the top and position at the bottome of the tag.
Copy and paste tag 1 as new layer and resize 70% or so and postion it to the lower right side.
Copy and paste sparkles and postion desired.
Activate CD layer and copy and paste doodle. resize and postion to the upper right side.
Copy and paste flower 1. Resize 50% and position on the upper left side of the frame.
Copy and paste flower 2. Resize 50% and position on the upper right side of the frame.

Now add your name. I used the font Pornstar in black. Added noice at 80% Gausian. Then Gradient glow with orange color of the kit.
Don't forget your copyright info ;) Thank you Kristin for this lovely kit!

Thursday, June 10, 2010

Cool Summer

Artwork by Ismael Rac. You need a license to use it work. Please check his website for licenesing info.
Template by Denz Designz
PTU Template, Cool Summer, by 3Ps in a Pod

Filters: Xero Radiance


Open template and duplicate. Close out the orginal. Delete the following layer, DenzDesignz, both life is sweet, both heart line.
Now activate large blue circle. Selections/Float-Defloat-Contract by 3. Open paper CoolSummer_pp8 and copy and paste as new layer. Selections/Invert and hit delete. Deselect.
Now activate 2 strips top layer and Selections/Float-Defloat-Contract by 3. Open paper CoolSummer_pp3 and copy and paste as new layer. Selections/Invert and hit delete. Deselect.
Now activate 2 strips bottom and Selections/Float-Defloat-Contract by 3. Open paper CoolSummer_pp3 and copy and paste as new layer. Selections/Invert and hit delete. Deselect.
Now activate Pink square and Selections/Float-Defloat. Open paper CoolSummer_ppr4 and copy and paste INSIDE selection. Deselect.
Now activate Pink circle and Selections/Float-Defloat-Contract by 3. Open Paper CoolSummer_ppr11 and copy and paste it INSIDE selections. Deselect.
Now activate blue circle and Selections/Float-Defloat-Contract by 3. Open paper CoolSummer_pp9 and copy and paste as new layer. Selections/Invert and hit delete. Deselect.
Now open your tube. Copy and paste it behind the 2 strips bottom layer. Resize and delete any overhang if needed.
Now activate you blue paper layer and selections/float-defloat. Copy and paste a close up tube as a new layer. Invert selection and hit delete. Deselect.
Now apply Xero Radiance with following settings :


Now activate Pink Circle and selections/float-defloat. Copy and paste a close up tube as a new layer. Resize if want. Invert selection and hit delete. Deselect.
Apply same Xero settings as above.

Now time to add some elements. You add your own creativity here but if you want to look at my example that is fine.
Elements I used are ele22, ele24, ele27, ele92, ele9, ele91, and ele110.
I used ele110 in the background. Resized it by 70% or so. Move to the left upper corner. Duplicate/ Mirror/Flip.
Now add the butterfly. resize and position on the left side on the middle circle.
Now add the life raft and resize it as needed. Move to the left bottom corner. Now add the sun and resize. Position it behind the middle circle and in the upper left corner.
Now add the palm tree and resize and move to the right side behind your main tube.
Now add your copyright info and name and whatever else you would like.

Thank you for trying my tutorial. Any questions or comment leave in the chat box or email me at ChaneyJo@gmail.com

Sunday, May 30, 2010

Tik Tok


click on preview to see full size


Artwork by Ismael Rac. You need a license to use his work and you can purchase one from AMI.
FTU Scrapkit Smitten by Creative Intentionz
Template #18 by ME. You can download it HERE
Mask of choice.

Filters used:
Toadies- Motion Trail
Xero-Porcelain


This tutorial is made for those with working knowledge of PSP.

Open template and duplicate it. Close the orginal. Delete Credit layers.

Activate clockback layer. Go to Selections/Select all, Float, Defloat. Open CIZ-Smitten-.Paper1. Copy and paste as new layer.

Drag the paper layer directly below the clock back layer. Change the clockback layers blend mode to overlay.

Activate squares layer. Go to selections/select all, Float, Defloat. Add new Raster layer. Flood fill with #9639cf or color of choice. Deselect. Go to effects/Toadies and use Motion Trail.

Use your magic wand and select the top circle. Open your close up tube and copy and paste as new layer. Position where desired and Invert the selecion and hit delete. Deselect.

Do the same for the bottom square. Merge the 2 tube layers together and change the blend mode to Luminance (L)

Now activate the circles layer. Go to selections/Select all, Float, Defloat. Flood fill with #ff58b0 or color of choice. Deselect. Use magic wand to select the top circle. Copy and paste tube as new layer. Resize if needed/want and position where desired. Invert selection and hit delete. Deselect
Do the same for bottom circle.

On the swirl layer go to Adjust/Brightness Contrast and change brightess to -150.

Now activate the rectangle layer. Select with magic wand. Open CIZ-Smitten-Paper8 and copy and paste as new layer. Invert selection and hit delete. Deselect and add dropshadow- h & v=0, Opacity=80, Blur=6.

On background layer add a new raster layer. add paper of choice or flood fill with color of choice. Apply your mask.

Activate tiktok2 and Go to selections/Select all, Float, Defloat. Flood fill with #ff58b0. Go to adjust and add noise. Uniform, 75%. Delete original.
Activate partydontstop2 and do the same.

Open your Full body tube and copy and paste as new layer. Position where desires.
Now add some elements for your own look. I added the light and element2
Add your copyright info and name. Now to the fun part.


(This is the first animation tut I have wrote and this is the only way I know how to animate. If you have a faster way please go ahead and use it. Maybe even shoot me an email and teach me LOL)

Animation:
Activate Minutehand layer.
Duplicate and rotate right by 45˚, Adjust/Sharpen (that way it wont get blurry with each rotate)
Duplicate and rotate right by 45˚, Adjust/Sharpen
Keep doing this till the minute hand make it all the way around the clock. (seven time)
Now hide all the duplicated MinuteHands.You can rename them if you want but I didn't

Activate HourHand layer
Duplicate and rotate by 3˚, Adjust/Sharpen
Repeat seven times.
Hide all the duplicated layers.

With the original hands showing Copy merged and paste into Animation shop and new animation.
Back at PSP hide original hands and unhide copy1. Copy merged and paste into animation shop after current frame
Back and PSP hide copy1 hands and unhide copy2 hands. Copy and paste after current frame.
Repeat until you have done all hand layers. Then save as gif file.

Saturday, May 29, 2010

You know you want me!


Full Body and Close up tube
Artwork by Ismael Rac. You need a license to use his artwork. You can purchase it at AMI
PTU Scrapkit, Sweet Love, by 3Ps in a Pod.
Template #16 by ME. Download it HERE
Mask of choice.
Filter:
Mura Miester-Copies
Eyecandy Gradient Glow (optional)
Xero-Radiance

This tut was writen for those who have working knowledge of PSP


Open my template in PSP. Duplicate and close the original. Resize canvas by 700x500 (we can crop later if needed) Delete credits layer.
Open your full body tube and close up tube and copy and paste them as new layers. Duplicate the close up. Hide those layers.
Activate the slats layer and go to selections/select all, then float and then defloat. Open paper17_bcc and copy and paste as new layer. Invert selection and hit delete. Delete orignal slats layer. Invert selection again.Apply dropshadow of choice.
Open your one of your close up tube and apply Mura Meister Copies with the following settling
Invert Selection and hit delete. Deselect. Apply Xero Radiance with default settings and then change the blend mode to Multiply. Drag this layer to right above the slat layer.
Activate your graycircle layer and use magic wand to select it. Add new layer. Use 2 colors from the scrap kit for your foreground and background. I used a light purple and light pink. Choose Gradient Foreground and background and flood fill circle selection. Apply dropshadow of choice. DO NOT Deselect.
Now open your other closeup tube. Mirror and position inside the circle selection. Invert selection and hit delete. Go to layer properties and change blend mode to Luminacnce (L) and change opacity to 50% Drag this layer down to right above the circle layer.
Activate heart layer and use magic wand to select it. Open paper10_bcc and copy and paste as new layer. Resize by 80% and position in the heart selection so you can see that Hot Chick words. Selection/Invert and hit delete. Delect. Apply dropshadow of choice. Delete orginal heart layer.
Now unhide your fullbody tube and position where desired. Resize if needed and apply dropshadown of choice.
Now Add a new layer. Floodfill with #744473 or dark color of choice. Go to layer/Load Mask and choose your mask. Now go to layers/Merge group. Now drag this layer to the bottom.
Choose one of the glitterswirl elements and copy and paste as new layer Position at bottom right corner. Duplicate and flip and then mirror.
Now open flower5_bcc and copy and paste as new layer. Drag the layer so its right below your fullbody layer. Resize but 30% and postion it on the top part of the circle. Duplicate it and move it a lil to the left (see my tag for example)
Open flower3_bcc and copy and paste as new layer. Resize 40% and position between the other 2 flowers.
Now you can add anymore elements you want to make it your own. Add the copyright info and your name and you are done! Thank you for trying my tut! I would love to see your results!

Friday, May 7, 2010

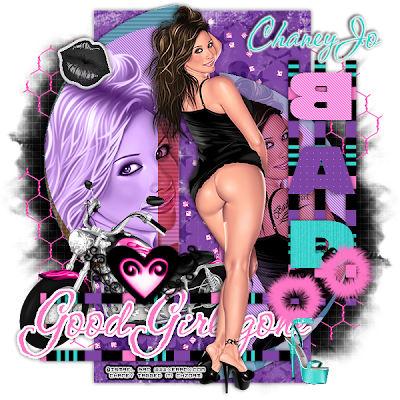
Good Girl gone BAD


Tube, Full body and close up.
Artwork I am using is by Ismael Rac. You need a license to use his work and you may purchase one at AMI.
Template #13 by ME, you can download it from my blog HERE
Scrapkit, Good Girl Gone Bad, by 3Ps in a Pod.
Mask 203 by WeeScottLass download HERE and put in your PSP Mask folder.

Filter used:
Filters Unlimited 2.0 - Gradient and Aged Film
Penta.com Color Dot
Vanderlee Unplugged - Interlace


Open template and Shift+D to duplicate. Then delete Credits layer. I also deleted the torn heart layer. I didn't like the way it looked for this tag LOL

Add a new Raster layer and drag all the way to the bottom. Flood fill with black and apply mask by going to Layers-Load/Save Mask-Load mask from disk and pick WSL_Mask302. Merge Group

Now activate the Rectangle layer and use your magic wand to select it. Now open paper_3pp_19. Copy and paste as a new layer. Then go to Selections/Invert and hit delete. Deselect and apply dropshadow, H&V-0 Opacity-80, Blur-9. Delete orginal rectangle layer.

Now activate lefthalfcircle and use selection wand to select it. Smooth your selections by going to Selections/Modify/Smooth #10 in both options. Now choose 2 contrasting colors from your tube, or scapkit you are using for the foreground and background. I chose a teal and pink color. Flood fill with the foreground color. Then use Filters Unlimited, Filters Unlimited - Gradient, Radial Fore to Background with default settings. Then use Vandlee-Unplugged-Interlace at default settings. Deselect apply dropshadow

Now activate frontlefthalfcircle layer and select with magic wand. Smooth you selection again and flood fill with a color of choice. Now go to Penta.com and use the jeans filter, default settings. Now deselect.

Open your close up tube and copy and paste as a new layer. Position it on the lefthalf circles layers then duplicate the tube layer. Drag the duplicated layer down under frontlefthalfcirle and then hide that layer.

Select your frontlefthalfcircle layer and select it by going to Selections/Float, them defloat. Now make your tube layer active and go to selections/Invert and hit the delete key. Now deselect. Change the layer properties on the tube layer to Luminance (L)

Now unhide you duplicated tube layer. select lefthalf circle the same way as you did for the front one and then activate your tube layer and invert selection and delete. Deselect and change the layer properties to Multiply.

Now on to the right side.
Now activate righthalfcircle and use selection wand to select it. Smooth your selections by going to Selections/Modify/Smooth #10 in both options. Now choose 2 contrasting colors from your tube, or scapkit you are using for the foreground and background. I chose a teal and pink color. Flood fill with the foreground color. Then use Filters Unlimited, Filters Unlimited - Gradient, Radial Fore to Background with default settings. Apply dropshadow

Now activate frontrighthalfcircle and select it and smooth selection. Flood fill with color of choice and use penta.com jeans filter at default settings.

Now copy and paste your tube as a new layer. Postition it where you like it and duplicate it. Drag the duplicated layer down to just above righthalfcircle.

Now activate the original tube layer and invet selection. If you accidently deselected it thats cool. Just make it active and go to selections/float/ then defloat.

Now change the layerproperties on the tube layer to Mupliply. Deselect
Now activate righthalfcircle layer and go to selections/float then defloat. Unhide your duplicate tube layers, Invert selection and hit delete. Deselect. Now change layer properties to Soft Light.
OK are you ready for a break LOL go ahaead, I'll still be here when you get back ;)

Back already? Did you being me some coffee cuz I need it! LOL lets keep going.


Now activate your vertical lines and use your magic wand to select them. Open paper_3pp_7 and copy and paste as a new layer. Duplicate the paper and hide it.

Now with the paper layer active invert your selection and hit the delete key. Deselect and apply samedropshadow as before.

Now unhide your other paper layer and free rotatae it 90 degrees to the left. Activate your vertical lines and use your magic wand to select them. Then with your paper layer active again invert the selections and delete. Deselect and apply dropshadow. Delete the vertical line layer

Now the wordart. First on the "Good Girl gone" use the dropper took to select the gray colors as a your background. Now make your foreground a pink color or whatever color you like. Then in the same dropdown menu as the dropped is a color replacer tool. Use it to change the gray to pink.

Next we are going to do "BAD" First select the B with you magic wand and smooth the selection. Flood fill with pink or a color of your choice. Now you can add an effect if you want. I did Penta.com Jeans

Now the letter A select with magic wand, smooth selection and fill with purple or a color you want. You can add a filter if you desire. I used Penta.com Color dot, Distance 10

Now the letter D select with magic wand, smooth selection and fill with teal or color you want. Filter I used is FilterFactory- Special Effects - Aged fill and I changed that Desatuation to 5

Now copy and paste your full body tube. Postition where desired. Apply dropshadow
Now its time for the elements

Activate your mask layer and copy and paste wiremesh_3pp_4 as a new layer. resize to desired size.

Activate frontrighthalfcircle and copy and paste bike_3pp_2 as a new layer and resize as needed.

Activate BAD layer and copy and paste cuffs_3pp_3 as a new layer. Resize them 40% and move them to the bottom of the D erase part of the chain so it looks like the the cuffs are going through the D. See my tag for example

Open sticker4_3pp and copy and paste as new layer. Move up to the upper left circle. resize by 30%

Open element_3pp_10 and copy and paste as a new layer. Move to right above the Good Girl Gone layer.

Now you can add more elements or leave it as is. Don't forget your copyrigt info and name!

Thank you soo much for trying my tut and would love to see your creations.

Wednesday, May 5, 2010

Girlz Rock


Artwork by Ismael Rac. You need a license to use his work and you can purchase his work from AMI
Template 114 by Yvette from Essence of Creativity
Scrapkit, Rock Princess, by Just a Girl Designs

Filters use: Xero-Soft Mood

Open Yvettes templater 114 and Shift+D to duplicate it and close the orginal. Delete the credits layer

Activate blue circles layer and use magic wand to select both of them. Open RockPrincess_bkg7 and copy and paste as a new layer. Selections/Invert and hit delete. DO NOT Deselect. Now open your tube and copy and paste as new payer. position where desired on the bottom circle and hit delete.
Paste tube again and postion it on the top circle and delete again. Deselect and merge the tube layers. Go to layer properties and change blend mode to multiply and opacity to 50, merge the tube layer down to the circles layer. Apply dropshadow of H&V - 0 Opacity-80 and Blur-6.
Delete the blue circles layer.

Activate largewhitecircle layer and use magic wand to select it. Add new raster layer and flood fill with color of choice. I used a darker pink color from my tube. Go to adjust, Add noise at Random, 50%. Deselect and delete original largewhitecircle layer.

Activate black rectangle and use magic wand to select it. Add a new raster layer. Now choose a light and dark layer from your tube. I used a light purple and dark purple to match the scrapkit. Select the foreground/background gradient, repeats 2, angle 0, and floodfill the selection. DO NOT Deselect. Paste you tube again and postion it to the left part of the rectangle. Selection, invert and then hit delete.Deselct. Duplicate and mirror. Merge tube layers Go to effects, xero and choose soft mood at default settings. Then go to layer properties and change blend mode to luminance legacy.

Apply drop shadow like before to the rectangle circle and then delete the orginal black rectangle layer.

Activate large pink layer and use magic wand select it. Open Rock Princess bkg6 and copy and paste as new layer. Resize by 50% then invert selection and delete. Apply dropshadow as before and then delete original pink circle layer.

Now paste your full body tube and paste it as a new layer and drag that layer to the top. Now merge the text layer with the thin black rectangles layer. Now use your selection to select part of the bottom rectangle behind your tubes leg area, selections/float and drag it above the tube layer
.
Now we can add elements. You can use my tag as an example or you can add different ones to your liking.

Activate the big circle paper layer and open RockPrincess_stardoodle and resize by 50%. Move to right side of your full body tube (see tag for example) and then duplicate and mirror.
Now you can add your copyright info and name. I used gradient glow on my name but it is not required.

Thank you for trying my tut.

Sunday, May 2, 2010

Bad Girl Trip


Tube of choice
Artwork by Ismael Rac. You need a license to use his artwork, you can purchase one at AMI
PTU Scrapkit, Cat Scratch Fever, by 3P's in a Pod

Filters used:
Xero Radiance (optional)

Open new canvas 700x700, we can resize later.
Open CatScratchFever_frame1 and copy and paste as new layer.

Resize by 60% and move to the upper part of your canvas
Use magic wand to select inside the frame and expand by 2 pixels. Go to selections/modify/expand.

Open CatScratchFever_pp17 and copy and paste as new layer. Invert selection (selections/invert) and hit delete. Invert selection and drag layer below frame layer.
Now open closeup tube and copy and paste as new layer. Invert selection again and hit delete.
Now go to effect and apply Xero Radiance with default settings. Change layer properties to Luminance (L)

Open CatScratchFever_frame3 and copy and paste as new layer. Drag above frame layer and resize by 70%. Position it at the bottom part of your chain frame.

Open CatScratchFever_elm31 and copy and paste as new layer. Drag to bottom of layers and postion in the right corner. Duplicate and mirror.

Add a new layer and rename it filmstrip back. Drag it just below the filmstrip layer. Open CatScratchFever_pp33 and copy it.

Now activate your filmstrip layer. Use magic wand to select inside the first box and modify by 2 pixels. Now activate your filmstrip back and copy paper into selection. Deselect.
Do the same thing for the other 3 boxes.

Now merge the 4 tube layers together and apply Xero Radiance effect again.
Now activate the filmstrip layer again and use magic wand to select the first box. Now open your tube and copy and paste as a new layer. Position it where desired inside the marching ants and then Invert selection and delete. Deselect. Now duplicate layer and mirror.
Activate filmstrip layer again and select the second box. Copy and paste tube and positon again and invert selection and hit delete. Deselect and duplicate and mirror. (I used a reg tube and then a close up but if you dont have that you can always resize the tube to get the diffrent sizes like I have)
Now merge the 4 tube layers together and apply Xero Radiance effect again.

Open CatScratchFever_elm64 and copy and paste as new layer. Move to the right side of the tag.

Now open your full body tube and copy and paste as new layer. Move to the left side of tag.
Now we can add some elements for our own lil flare. I added the handbag element and the black and red bow.

Now add your name and copyright info.

Monday, April 26, 2010

I Am Your Heaven Tut


U need a close up tube and a full body tube

Artwork by Ismael Rac. You need a license to use his work and you can purchase that at AMI.
PTU Scrapkit Angelic by 3Ps in a Pod.
Template 10 by me you can download HERE

Font used Pharmancy

No filters used

Open tempate. Duplicate and close original. Delete the credit layer and change the canvas size to 700x700 we can crop later

Activate the Pink circle layer and use magic wand to select it. Open Angelic_pp_12 and copy and paste as new layer. Resize by 80% and invert selection and delete. Invert selection again and open close up tube and copy and paste as new layer. Postion where desired and invert selection and hit delete Deselect and delete the original pink circle layer. Change the layer properties to luminance (L)

Activate the upper square layer and use magic wand to select it. Open Angelic_pp_22. Copy and paste into selection. Now open your closeup tube and copy and paste as new layer. Postion where desired inside selection and invert selection and hit delete. Deselect.
Do the same for midsquare and upper square layers.

Now active ImYour layer. Make your foreground color #cadbfc and your background color #d54e9b. Use the color replacer tool, it is in the dropdown where your color dropper tool is, and change the color of the wordart.
Do the same for Tonight layer.

Now activate Heaven layer and make your foreground color #9cb4fe and your background color #d6027a and use the color replacer took to change the color of the wordart.

Now merge the wordart layers together and drag it to the upper part of the circle.
Activate slat 1 and use magic wand to select it. Open Angelic_pp7 and copy and paste as new layer. Invert selection and hit delet. Deselect and add dropshadow with following settings. V- -1 H- -2 Opacity-80 Blur-6
Do the same for the other 2 slat layers.

Now the fun part. The elements.

Activate the bluecircle layer and open Angelic_ele51 and copy and paste as a new layer. Position it where desired.
Now on the background layer copy and paste Angelic_ele56.
Now on the slat layer open Angelic_ele21 and copy and paste as a new layer. Resize by 50% twice and put it where desired. Look at my tag for examples.
Now on the mid square layer open Angelic_ele17 and copy and paste as new layer. Resize to desired size, I did mine by 35%. Move to the corner of the mid square.
Now open and copy and paste Angelic_ele92 and resize 15% or your desired size and move to the corner of upper square.

You can add more or diffrent elements to your desire!!

Now add your copyright info and your name and thank you for trying my tuts. I would love to see your creations so please email them to me at ChaneyJo@gmail.com

Saturday, April 24, 2010

Can't Wait tutorial


This tutorial is writen for those with working knowledge of Paint Shop Pro.

Artwork by Ismael Rac. You must have a license to use his work and you can purchase one at AMI.
Scrapkit- Vivid Crush by GinasGems Scraps
Template 8 by Teresas Treasures

Filters used-
VM Extravaganza
Xero Radiance
Eyecandy Gradient glow for name if wanted.

Font used- Lucida Handwriting

Open template and hit Shift+D to duplicate. Close out the original.

Activate Circle layer and use magic wand to select it. Add new Raster layer. Flood fill with color of choice. I used #12dad7 DO NOT deselect.
Add another new raster layer and fill with a different color. I used #ab40c1. Delete original circle layer. With your first circle layer active, go to Adjust, Blur, Gaussian Blur 10. Then go to Effects/Filters/VM Extravagnza Transmission, Line Width-6, Offset-7, Contrast-40
Now activate your purple circle and add drop shadow of your choice. I used V and H - 0, Opacity-65 Blur-6 and color black

Activate Rectangle and use magic wand to select it. Open Vivid Crush paper 17 and copy and paste as new layer. Selection/Invert and hit delete key. Deselect. Apply drop shadow with same settings as before.
Activate Strip 2 and use magic wand to select it. Open Vivid Crush paper 18 and copy and paste it as new layer. Selection/Invert and hit delete key. Deselect. Apply same drop shadow as before.
Repeat the same steps for Strip 1.

Open one of the tape elements and copy and paste as new layer. Re-size 30%. Free Rotate 45 degree to the left. Position in the upper left corner of the rectangle. Duplicate and move to the lower right corner.

Choose #12dad7 for your foreground and #ab40c1 for your background (or colors off your choice) Choose the Foreground/Background gradient with following settings: Repeats-0 Angle-50.
Activate photomat2 and select with magic wand. Flood Fill with gradient and deselect. Now change the angle on your gradient to 315. Activate and select photomat1 and flood fill with gradient but DO NOT deselect.
Open your tube and copy and paste as new layer. Position in your selection. Invert selection and hit delete. Duplicate layer and mirror. Move your duplicated layer above photomat2.
Now apply the Xero Radiance filter to your tube layers with default settings. Then change the layer properties of your tube layers to Multiply.
Activate your frame layers and give them some noise at settings you like.
Change the colors of the flowers to #12dad7 using the color replacer tool. Its in the drop down of our color dropper. Choose #12dad7 for the foreground and #c0c0c0 for the background and then using the color replacer tool change the color of the flowers. Then add drop shadow and move the flowers to the upper right side of the purple circle.

Now paste your tube layer as new layer and position in the middle of your tube frames and then apply drop shadow with V= -1 and H= -2.

Now time to add the elements. First open one of the heart locks and re-size by 30%. Now position it on the right side of frame2. Use your eraser tool to erase the top part so it looks like its behind the frame.

Now open one of the satin bow and copy and paste as a new layer. Mirror it and position it in the upper left side of the circle.

Now open one of the notebooks and copy and paste as new layer. Re-size 40% and free rotate to the left 45 degrees. Add drop shadow.

Now using your text tool font of choice or one I used and color #ab40c1 write your phrase of choice. Mine was "Can't wait to see u tonight" Rotate to the left 45degrees and position it on the paper.

Now add your copyright info and your name. Using gradient glow on your name if desired. Copy and re-size if needed.

Thank you for trying my tut and if you have any questions or would like me to show off your results just email me at ChaneyJo@gmail.com

Tuesday, April 20, 2010

Sweet Tutorial


Need a tube and a close up tube.
Artwork by Ismael Rac. Must have a license to use his work and you can purchase that at AMI
Template 114 AND scrapkit Bad Candy by Toxic Desirez

Filters Used:
Penta.com Color dot
Xero Radiance

Open template, Delete credits and change canvas size 700x700

Activate Purple Circle layer and use magic wand to select it. Open Paper 2 (or paper of your choice) and copy and paste as new layer. Selections/Invert and hit delete key. Deselect.

Activate Green Circle layer and use magic wand to select it. Open Paper 13 (or paper of your choice) and copy and paste as new layer. Resize by 60%, position it so its all inside the selection and invert the select and delete. Deselect.

Activate Rectangle layer and use magic wand to select it. Open Paper 24 (or paper of your choice) and copy and paste as new layer. Invert selection and hit delete. Deselect.

Use #ff29b5 for your foreground and #40edff background gradient. Gradient settings- Angle 42 Repeat-0. Activate small white circle, select with magic wand and flood fill with your gradient.
Now change your foreground color to black. Activate LargeWhitecircle, select with magic want and flood fill with gradient. Deselect. Now use your selection tool, rectangle to select a section in the middle of the circle. Go to Effects/Filters and use Penta.com Colordot filter value-255 distance-10

Now open Bad Candy-Extras-Barbedwire and copy and paste it as a new layer. Resize by 70% and drag it below your pink paper circle. Delete the extra part that is hanging over.

Now open Splat1 and copy and paste as new layer. Resize 60% and move to the upper left corner. Duplicate layer and mirror then flip it. Merge that layer down and then drag the splat layer to the bottom so its behind everything else.

Open your close up tube. Copy and paste as new layer and mirror if desired. Activate and select your sml white circle and then activate your close up again and then invert selection and hit delete. Deselect.

Go to effects and apply your xero radiance filter with default settings. Then go to Layer properties and change blend mode to Luminance (L).

Now copy and paste your tube as new layer and position it where desired. Then delete the extra from around the outside of the circle. To do this I activate that circle layer. Selection/Float, then defloat. Then activate the tube layer, selection/invert and hit delete. But if you know of a diffrent way that works for you by all means use it ;)

Now the fun part, adding all the elements. This is whre you can add your own twist but I will go ahead and tell you what I did.

First I added bow1 and resized it 70% and put it at the corner of the rectangle.
Then I added bunny and resized it 70% and put it in the right lower corner.
Then I added one of the butterflies and resized it 50% and put it in the upper right corner.
Then I added one of the labels in the Extras folder. You can add dropshadow of your desire.

Now add you name and copyright info and you are finished! I would love to see what you creat so email me those creation at ChaneyJo@gmail.com

Sunday, April 11, 2010

Glamourous Girl Tutorial


Artwork by Ismael Rac. You need a license to use his artwork and you can purchase that at AMI
Template 143 by Toxic Desirez here
Scrapkit GlamPrincess PTU by Addictive Pleasures.


Open template, Duplicate and close the original. Delete the credits layer and background layer and then resize canvas to 700x700. We can crop layer.
Open P8 or paper of choice. Activate top Pink Circle layer and select with magic wand. Copy and paste P8 as new layer. Selection/Invert and delete orginal Pink circle layer.
Choose to colors of your choice. I used a light blue and light purple to match the scrapkit I am using. Make Left Frame Back active and go to Selection/Float, then Defloat and fill with gradient.
Do the same for layer Frame Back Right.
Make Glitter Circle layer active. Go to Adjust/ Hue and Saturation/ Colorize and use these settings= Hue-145 Satuation-179 or whatever settings you would like.
Make the back Pink Circle layer active and go to Adjust/Hue and Saturation/ Colorize using these settigs= Hue-210 Saturation-116 or settings you like.
Make Upper Right Circle active and use magic wand to select it. Open P7 and copy and paste as a new layer. Selections/Delete and then deselect and delete the orginal Upper Right Circle layer.
Do the same for Lower Left Circle layer.
Make Upper Right Glitter Circle active. Go to Adjust/ Hue and Saturation/ Colorize using these settings - Hue-230 Saturation-255 and then go to Adjust Bighten/Contrast and use these settings= Brightness-75 and Contrast- (-50)
DO the same for Lower Left Glitter Circle.
Active Upper Left Rectange and use magic wand to select it. Open P2 or any paper of choice and then copy and paste as a new layer. Go to Selections/Invert and hit delete and then deselect.
Do the same for Lower Right Rectangle
Change the color of the dotted lines if desired.
Now the fun part, adding all the elements then the tubes.
First element I added was the Pearl. Delete the Sm Stars. Open Pearl and copy and paste as as new layer. Resize by 30%. Move over to the left end of the thin rectangle. Dupliate and Mirror.
Now the lips. Make the Lrg Stars layer active and then delete. Copy and Paste Lips as new layer and resize by 50% Dupliate and postion them where desired. Activate Sparkle Sheet and paste as new layer. Drag it so that its right above the lower Right rectangle.
Now open glitter and copy and paste as new layer. Drag it to the bottom of the tag. You might have to duplicate it and position one in the upper left corner and one in the lower right corner.
Now paste your main tube in the center. Then if you are using a close up activate Frame back left and selections/Float/ then Defloat. Paste the tube and postion it in the center and then hit delete. Deselect and lower layer opacity to 50.
Duplicate layer and hit mirror. Then add your credits, any other odds and ends you like and you are done!! Thank you for trying my tut and I hope that you enjoyed it! Make sure you give love whenever you download something from someone! They work hard to make these for us to use.

Sunday, April 4, 2010

I Love Being A Bad Girl

Artwork by Ismael Rac. You need to purchase a license to use his work from AMI.
My Bad Girl kit which you can purchase from one of the stores I sell in. Scraps With Attitude or Just 4 Taggers.
My template which you can download from my other blog here


Open CJC_temp09
Resize canvas 700x700

Delete grayrectangle 1 and 2 layers. We wont use those (unless you want to do your own thing with them)

Activate largegraycircle layer and use magic wand to select it. Open paper of choice (I used CJC_BadGirl_ppr0) and copy and paste as new layer. Resize paper layer by 60% and invert selection and hit delete. Deselect.

With you Largecircle layer activate open CJC_BadGirl_06 and copy and paste as new layer and resize 68%. Move so its right over the Largecircle.

Activate blackrectangle1 layer and use magic wand to select it. Open CJC_BadGirl_ppr14 (or paper of your choice. Resize by 60% and then copy and paste it as new layer. Selections/Invert and hit delete. Deselect. Add dropshadow of choice. Repeat for blackrectangle2.

Activate Glittercirle1 and colorize it with following setting: Hue- 133 Sat-252. Do the same for Glittercircle2.

Choose 2 contrasting colors for your foreground/background gradient. I used black (000000) and the purple color from the BadGirl Pallet (#de0be6). Activate your graycircle2 and select it with magic wand. Add new raster layer and fill with gradient. Delete orginal graycircle layer. Add your tube as new layer, position it where desired and invert selections and hit delete. Change layer properties to Luminace (L).

Repeat for graycirclelayer2. You can use a differnt tube like I did or the same one. Use your creativity to make it your own.

Copy and paste your main tube. Resize as needed. Now for the fun part. Adding all the elements. Here is where you can use your creativity but I will tell you what I did for guidance.

Open CJC_BadGirl_elm38. Resize 80%. Copy and paste as new layer and drag to the bottom. Move to the top left corner. Duplicate layer and move to the bottom right.

Open CJC_BadGirl_elm49. Copy and paste as new layer. Resize 40% and move where desired or look at my tag for example.

open CJC_BadGirl_elm34 and copy and paste as new layer and move where desired.
Add a few more elements to your liking. Add your copyright and name and you are done! Don't it look and FEEL great ;) MAN I love tagging!! I hope you liked my tut and please send me some of your creations so I can show them off for ya. Send them to ChaneyJo@gmail.com